Serve your static website in Github

Introduction
GitHub offers static web hosting for you and your apps this is called GitHub Pages, you can use markdown (jekyll or just plain html), for example for this blog I generate all the files with Hugo.io and that gets deployed to GitHub Pages, the configuration is fairly simple as we will see in the following example (this blog setup).
GitHub pages offers some great examples that are really easy to follow, but if you want to know how I configured everything for this blog continue reading :), if you like it or have any comment use the disqus box at the bottom of the page.
Pages
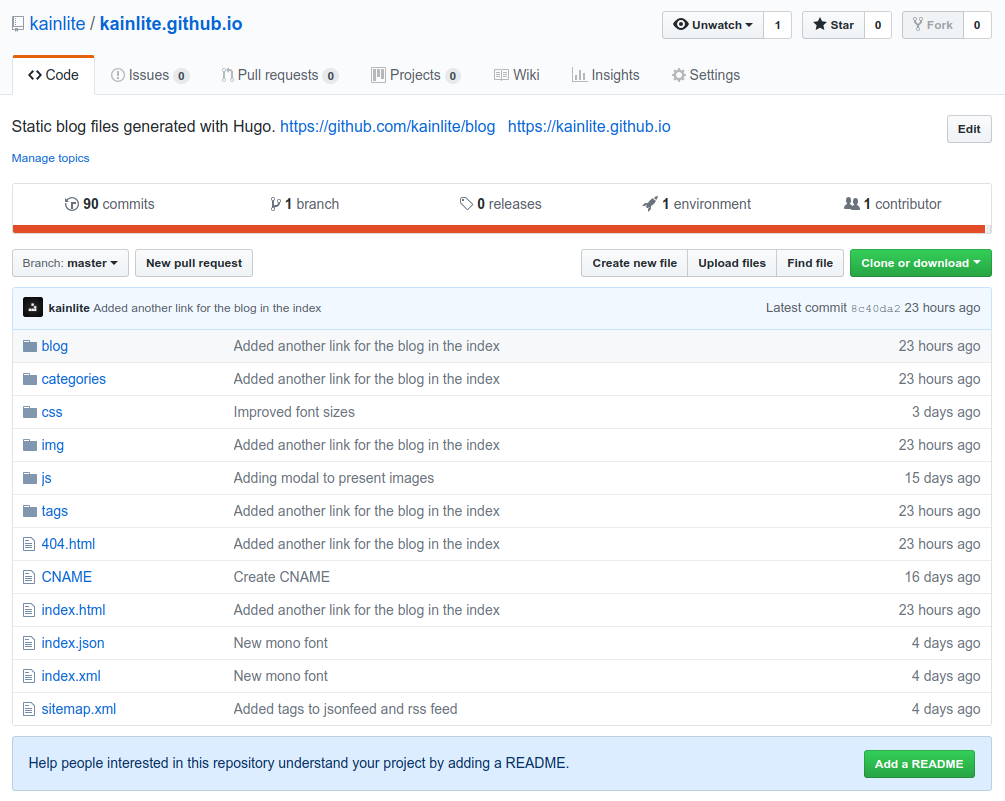
The first step in order to use GH Pages is to create a repo (assuming that you already have an account) with the following name: username.github.io in my case is kainlite.github.io, as we can see in the following screenshot:
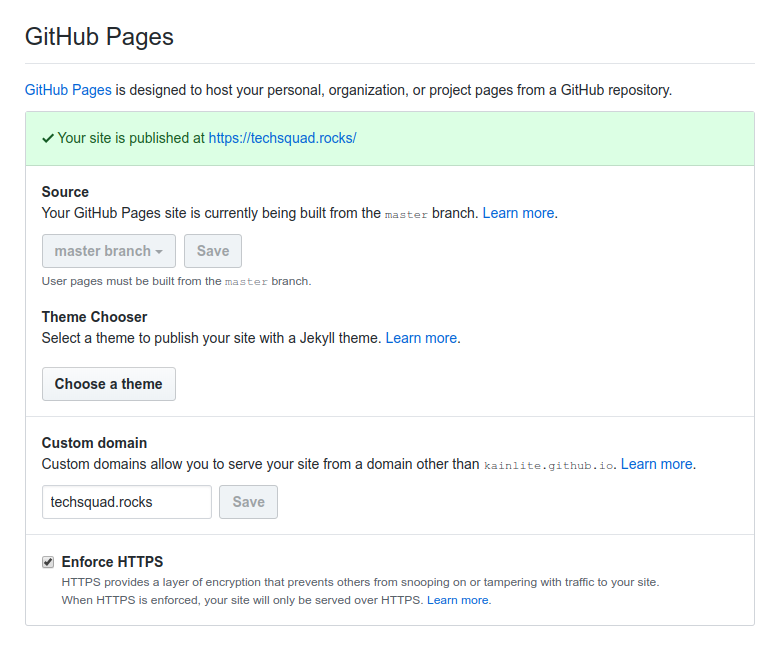
 This repo already has the blog files, but as with any github repo you will see the default commands to push something to it, the next step is to configure the pages itself, for that you need to go to Settings (be sure to replace username in the link), then scroll down to the GitHub Pages section. It will look something like this:
 As you can see the configuration is fairly simple, you choose the branch that will be used to serve the site, you can even pick a theme if you are going to go with Jekyll, and you can also have a custom domain and https, in this case as I push the static html files to the master branch I selected that branch, you can have any branch you like but it’s common to use gh-pages.
DNS
For the custom domain you need to create the following entries in your DNS dig techsquad.rocks, you can find these ips in this page:
techsquad.rocks.        300     IN      A       185.199.110.153
techsquad.rocks.        300     IN      A       185.199.111.153
techsquad.rocks.        300     IN      A       185.199.108.153
techsquad.rocks.        300     IN      A       185.199.109.153
After a few minutes it should start working, and whatever you have in that repo will be served as static files, there are some limits but they are really high so you can probably start your site or blog or whatever without having to worry to much about it. If you want to know what those limits are go here, as of now the repository size limit is 1Gb, and there is a soft bandwidth limit of 100GB per month, also 10 builds per hour.
Go Hugo
Now to the interesting part, Hugo let’s you configure and customize several aspects of the generated files, first be sure to install hugo with your package manager or with go, the steps to create a blog are fairly simple:
hugo new site testing-hugo
# OUTPUT:
# Congratulations! Your new Hugo site is created in /home/kainlite/Webs/testing-hugo.
#
# Just a few more steps and you're ready to go:
#
# 1. Download a theme into the same-named folder.
#    Choose a theme from https://themes.gohugo.io/, or
#    create your own with the "hugo new theme <THEMENAME>" command.
# 2. Perhaps you want to add some content. You can add single files
#    with "hugo new <SECTIONNAME>/<FILENAME>.<FORMAT>".
# 3. Start the built-in live server via "hugo server".
#
# Visit https://gohugo.io/ for quickstart guide and full documentation.
As I have shown in the tmux article, I like to have 2 panes one small pane where I can see the files being rebuilt at each save and another pane with Vim to edit the source code. You can start the hugo webserver for development with hugo serve -D and it will listen by default in the port 1313. It is very common to use themes, so you can go to the themes page and start your project with one of those, there are several ways to install the themes, and you can see the installation steps at the theme page, for example for the blog I started with Sustain but then modified it to match my needs.
Publishing with git push
The most interesting part of this setup is the simple automation that I use to publish with git push, I created the following hook in the blog repo .git/hooks/pre-push:
#!/bin/bash

COMMIT_MESSAGE=`git log -n 1 --pretty=format:%s ${local_ref}`

hugo -d ~/Webs/kainlite.github.io
ANYTHING_CHANGED=`cd ~/Webs/kainlite.github.io && git diff --exit-code`
if [[ $? -gt 0 ]]; then
    cd ~/Webs/kainlite.github.io && git add . && git commit -m "${COMMIT_MESSAGE}" && git push origin master
fi
What this simple hook does is check if there is any change and push the changes with the same commit message than in the original repo, we first grab the commit message from the original repo, and then check if something changed with git, if it did then we just add all files and push that to the repo, that will trigger a build in github pages and once completed our page will be updated and visible (it can take a few seconds sometimes, but in general it’s pretty fast).
And that’s how this blog was configured, in the upcoming articles I will show you how to host your static website with S3 and serve it with cloudflare, after that we will use a go lambda function to send the form email, let me know any comments or anything that you might want me to write about.
Pages Environment
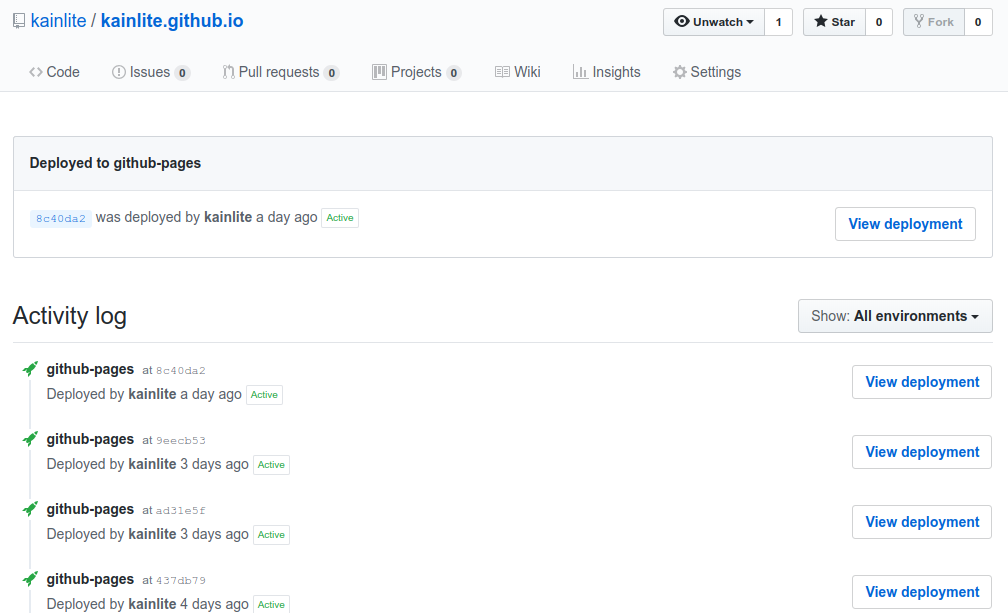
If you paid attention at the first screenshot you probably noticed that it says 1 Environment that means that GH Pages have been already configured and if we click it we can see something like this:

For static html sites it would be unlikely to see a failure, but it can happen if you use Jekyll for example and there is any syntax error.
Errata
If you spot any error or have any suggestion, please send me a message so it gets fixed.
Also, you can check the source code and changes in the generated code and the sources here
-
Comments
Online: 0
Please sign in to be able to write comments.